There aren’t many. The elements necessary to plan and get down to business quickly don’t require in-depth study. In fact, a lot of the planning is done without any real requirements or when the project is already on the go. The details start becoming clear when the first draft planning is done and even when the team is assembled.
The start date for project implementation tends to be put back. This means that it always seems that the deadlines are short. One way to be on time, fulfilling these deadlines, is none other than starting to implement the project as soon as possible. The logic is overwhelming!
It is therefore necessary to make the first planning as quickly as possible in order to speed up the start of the project. We can only achieve this with apps that automatically generate the work paths – taking into account the activities added to the calendar and the links between them. So, automation becomes our number one ally to get down to business asap.
In this article, we will identify the basic elements needed to begin to plan and move onto implementing the project, to ensure nothing and no-one is waiting while you create the perfect plan.
Some of recommendations include…
- The earlier you can define the main project objective and the methodology needed – depending on its nature – the better. Lesson 1 of the free online project management course will give you some more tips.
- Call the first team meeting soon so as to present the main aspects of the project. Above all, bear in mind that this meeting will be social in nature for the team. Remember that you can use the planning as a communications tool. You can invite your co-workers sooner so they can access the planning earlier.
- Assign clearly defined tasks and responsibilities and… get down to business!
- While the project starts being implemented, install open communication among the team. Your co-workers can communicate through the application itself not to mention share documents and find out the latest details on what is happening in the project.
- Quantify all the doubts that come to you and also to all the interested parties in the project. The earlier these matters come up, the fewer will appear later on in the project.
- It will also help us identify possible situations or risks that may arise in the project. There will be many at the start, so only save the project simulations that have the highest likelihood of occurring in the initial stages.
- Quickly replan using automatic apps which recalculate the optimum work path and prioritise the most critical activities for you. This will provide us with some very useful information to clear up doubts: the minimum duration of the project.
The 5 things required in the first planning for your project to get down to business quicker:
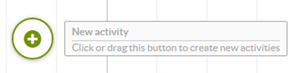
Añadir una actividad
Creating a new activity is among the very first steps when planning our project. Thus, on the lower left-hand side of the planning, click on the following button or drag it directly to the date we want the activity to start.
Key steps in order to plan the new activity
By clicking on or dragging the icon, the new activity panel wil automatically open on the right-hand side of the screen. We will manage all the data for this activity here. The most relevant data will that which refers to your planning: title, personnel assigned to it, start date (if the new activity needs to start on a particular date), duration and the activities to which it is linked.
Assigning people
When we add people from the team to a new activity, we are linking them to all the actions that are involved in it. Sinnaps automatically informs the users assigned about what is happening with this activity, as well as about comments made in their conversations.
Thus, in order to assign people to the activity, the Project Manager will click on this button on the activity panel and write the name of the person to be assigned.
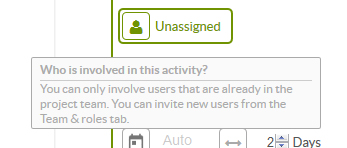
Note: only the people who have accepted an invitation to be part of the project may be involved in the activities. If you want to invite people onto a project, you can do this from the TEAM tab (in the lower part of the screen).
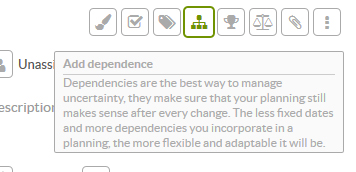
Link activities
Linking activities is the basis to creating flexible planning and to tackling project uncertainty.
Linking activities means the start of one depends on another finishing. By creating a dependency, Sinnaps will always add the new activity after the chosen activities. The quickest way to link activities is by selecting the following button ![]() ,located on the planning activities.
,located on the planning activities.
You could also create dependencies on the activity panel, managing the list of dependencies. From this panel, you can choose both specific activities and objectives for other activities to create the dependencies. Find out more about the options on the activity panel in this article.
Should we not associate a date or dependency with the new activity, Sinnaps will place it at the start of the work flow given that, as it has neither dependencies nor dates assigned, it can be done on the first day.
Note: find out more about how to link activities by visiting this ‘how to’ tip.
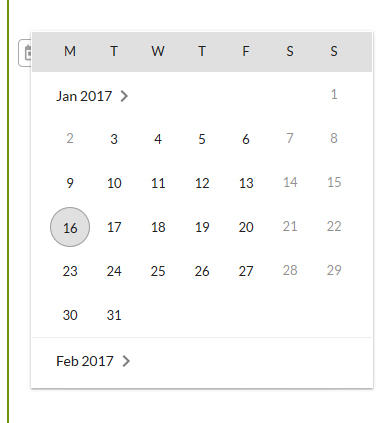
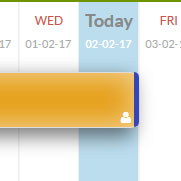
Establecer una fecha fija en la actividad
There are two ways we can give an activity a specific date: click on the previously created activity and drag it to the date we want to set it in motion. We can also do this from the information panel, using the date on the calendar directly.
Note: it is possible it won’t let you assign a date prior to the start of the project. If you want to change the start date for the project, you must access Testing Mode first, create a simulation and then, in Project Overview, add the new project start date.
NB: the activities with dates may limit the room to manoeuvre for other activities. Thus, planning with set dates means our planning will be more rigid as the interdependent activities are also limited. However, the dependencies prevail over set dates, so it’s possible some activities can be replanned automatically if changes are made.
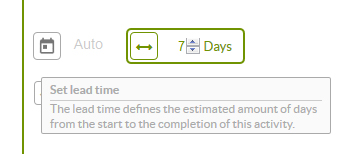
Add a duration to the activity
With the preceding steps taken, we just need to assign a time to the new activity to start to shape our planning. We can do this in two different ways:
– Click on the blue edge which is on the right-hand side of the activity on the planning and stretch it across to the date we want.
– Or, from the activity information panel, we directly add the total number of days the activity in question will last.
Note: you can find out more about how to change the duration and dates for your activities in this tip.
